Give your car the care it deserves with DIY car detailing that goes beyond a simple wash. Achieve a professional-looking finish with these expert tips and techniques, ensuring your ride shines with a pristine and gleaming appearance.
Also Read: Tata Tiago vs. Punch
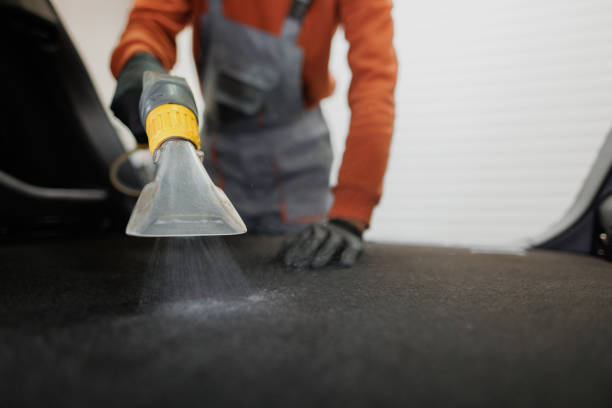
DIY Car Detailing: Detoxifying Your Interior
To neutralize cigarette smoke, purchase a spray can of Dakota No-Smoke. Hold the can 12 to 14 inches away from the fabric and lightly spray the headliner (do not soak), seats, door panels, and carpets. Then, set the fan to its highest setting and switch the system to recirculate mode (or “Max A/C” if that option isn’t available).
Place a tissue near the blower motor to locate the intake port. Then mist the opening. Keep the windows closed for at least an hour. Your car will smell like baby powder for a while, but this will quickly disappear. Cleaning Leather It may sound extreme, but if you have leather upholstery, buy a leather cleaning kit and keep it in your car (one brand is Leather Master Leather Care Kit).
The sooner you remove the stain, the greater the chance of it being completely cleans. Lipstick, ink and paint stains on clothes (and plastic bags) can become permanent in just 24 hours if you wait. Before removing stains, pre-treat the leather with a care product. Wipe and rub ink remover directly onto pre-treated leather. Leave for 30 seconds and wipe off with a clean cloth. Then apply leather cleaner and leather protector cream.
DIY car detailing: Lubricating the hood hinges
Wipe the hinge area with a clean cloth and spray with a few drops of white lithium grease or regular engine oil. Move the hinges several times to allow the grease to penetrate the hinges. Be sure to apply grease to both sides of each hinge.
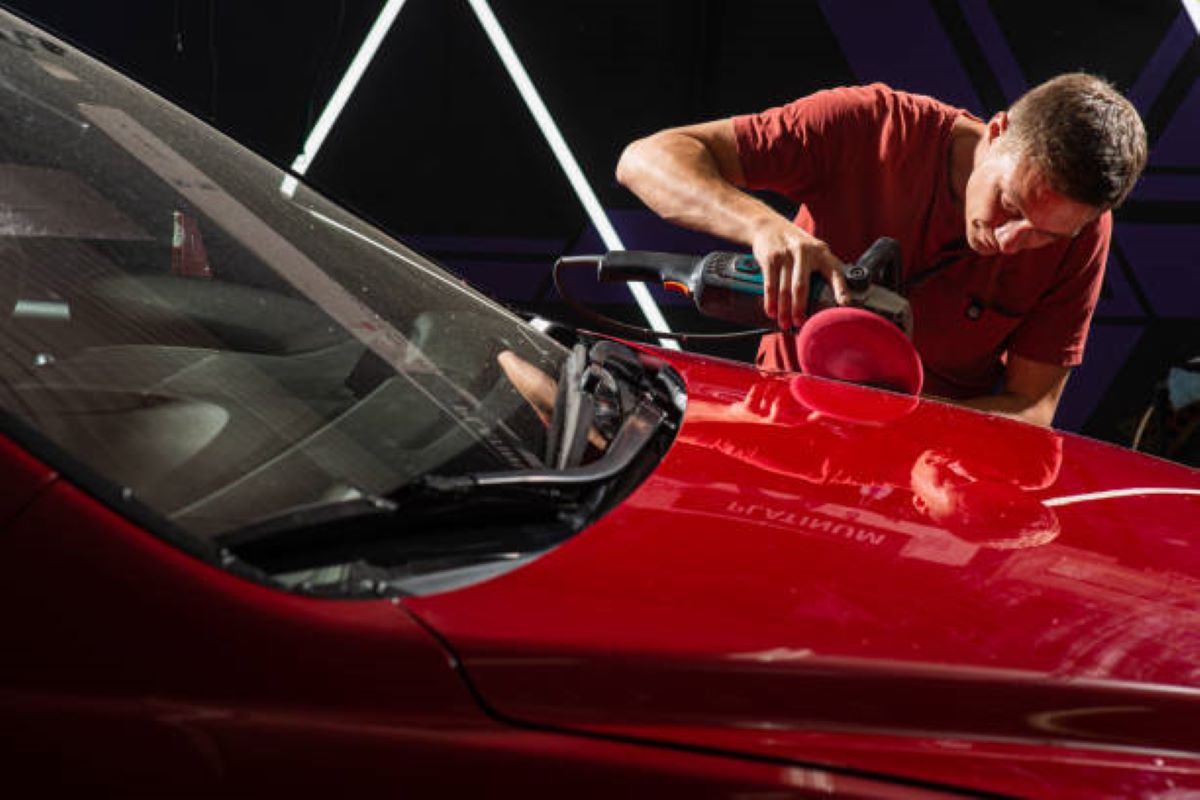
DIY car detailing: Polishing a Surface
Many car owners confuse polishing with waxing. However, there are two different steps. Polishing removes small surface imperfections and scratches and buffs the surface to a shiny state. Waxing ads shine and protect the surface from the elements. Here we explain the difference between car polishing and waxing.
Most DIY car detailing practitioners avoid polishing because they don’t want to spend money on a polisher or go through the effort it takes to polish by hand. But polishing your car’s paint is the key to getting the best shine (pros never skip it).
Replacing your car’s carpet
You got a good deal on a “used” car, but the carpet in your car is terrible. Stain removers have gone too far. New carpet is the best solution. You can buy pre-made carpets to match your car’s make, model, and color and install the carpet yourself. In most cases, it will only cost about $200 and take an afternoon to install.
Cleaning your hood latches
Be sure to remove any sand particles that may be trapped in the existing grease. If any parts are rusted or stuck, spray the latch with WD-40 and run the mechanism a few times. Wipe it down again and apply a generous amount of white lithium grease.
Related: Brezza vs. Grand Vitara: Which is Better?
DIY Car Detailing: Removing Pesky Stickers
All those national and state park stickers may bring back great memories, but they can pile up and pose a visual hazard. A quality sticker can be removed if you get under a corner and carefully peel it off at a 90-degree angle. Some leave a sticky residue behind and require a bit more care. Cover the dash with an old towel and apply a light coat of a degreaser like Goo Gone. Then scrub and wipe.
Removing Small Paint Scratches
Gather 3,000-grit sandpaper, abrasives, polishing compounds, and scouring pads. You’ll also need a portable drill or a dual-action sanding unit (DA). Most components can be purchased at an auto parts store.
How to Remove Paint Scratches: Use the Right Detergent Most DIYers start with dish soap.
But you shouldn’t! Dish soap is too harsh for car care. It strips important oils from your car’s paint and can shorten the life of your paint.
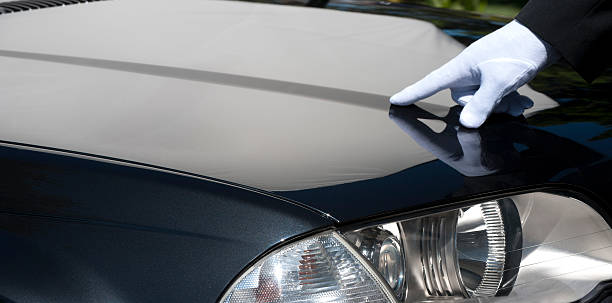
DIY Car Detailing: Achieve a High-Gloss Shine with Synthetic Wax
Some people swear by carnauba wax. It produces a deep, warm shine. But we prefer the wet shine of new synthetic polymer waxes (also known as paint sealants) like Meguiar’s Ultimate Liquid Wax. It’s more expensive than other synthetic waxes, but a big advantage is that it doesn’t leave a white film on plastics and trim. Plus, it’s super easy to use.
DIY Car Detailing: Eliminate Squeaking Doors
If your door creaks every time you open it, the hinges may be stuck due to corrosion. If this is the case, spray the hinges with WD-40 to loosen them, and then move the door a few times to allow the lubricant to penetrate. Once the hinges work again, spray with white lithium grease or motor oil, move the door a few times, and wipe off any excess lubricant.
Check the door latch for corrosion. Many modern door bolts have a non-metallic composite mechanism and should be lubricated with a silicone spray. DIY car detailing means finding and treating all the trim lines and recesses that a quick superficial clean might miss.
Wrap a cloth around an old screwdriver (one with no sharp edges) and spray the cloth with Simple Green or another all-purpose cleaner. Gently run it along the trim lines to remove dirt. Refresh the surface of the cloth again and again. Take a look at all the buttons and controls, too.
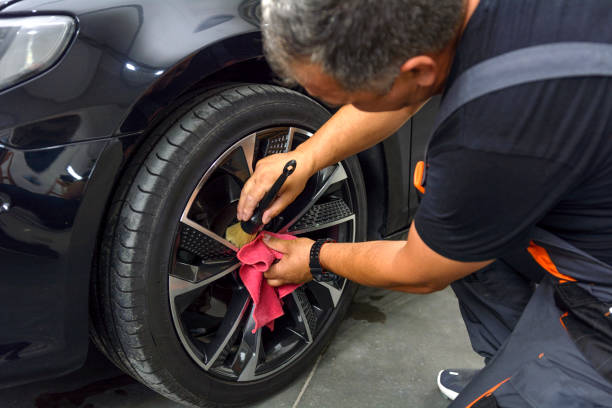
Repainting Wheels
A middle-aged car can still look fine, except for signs of wear on the wheels and hubcaps. Luckily, you can fix this yourself for a small fee. It takes a full day to de-rust and paint the wheels. (Don’t panic; you’ll mostly just be waiting for the paint to dry.) The wheels should dry for another 24 hours after painting before you put them back on.
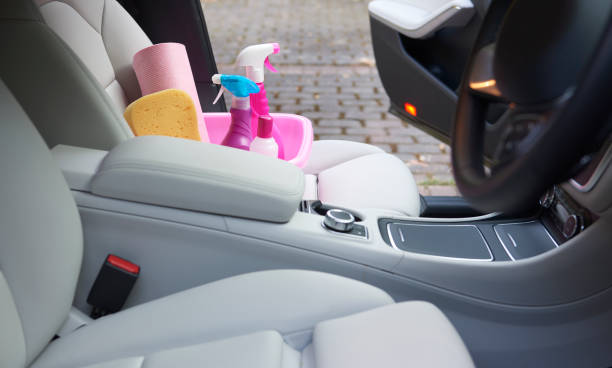
Here’s how to do it: The best way to clean your car: Push the seats forward to throw out the trash you’d be surprised what’s behind the seats.
Also, check our collection of used cars in India.
We’ve found lost cell phones, enough pens, and pencils to stock a small office, and change for several vending machine lunches. Vacuum the seats, remove the mats, and vacuum the carpets. Use a brush attachment for the dash and door panels.
Don’t forget to clean and vacuum those handy door pockets (another source of buried treasure). Learn how to find the best vacuum cleaner for your job.
Brush and Vacuum Carpets
Car carpets don’t like to have dirt left behind when you clean your car. If you just vacuum, a lot of it will be left behind. To remove more dirt, use a fine brush to scrub the carpet while you vacuum. You’ll see dirt particles jump up to the surface so you can vacuum them up with a shop van as part of your car care routine.
DIY Car Detailing: Vacuum Dust While You Clean
Most DIYers start their interior cleaning by shampooing the carpets. That’s a mistake. Cleaning the top surfaces will only make them dirty again. Instead, try our car trick and start at the top and work your way down. Then clean all the glass, getting rid of any dust in any nooks and crannies.
Use a detail brush to get rid of any dust in any crevices. Immediately vacuum up all the dirt.
DIY Car Detailing: Apply Protective Film
The low-hanging hood and aerodynamic side mirrors on new cars are highly susceptible to paint chipping from flying road debris. To protect the paint, dealers apply a thin, clear, rubbery paint film to these surfaces. This film reduces paint chipping, but dealers charge about $400 for it. Wraps can be purchased online and installed yourself in a few hours for about $120 (or less depending on the size of your car).
It’s not complicated, but it does take practice, so buy an extra set of foil for your mirrors and try it out first. Once you get the hang of wetting, stretching, and squeegeeing the film around the mirror, you’ll find it much easier to put on the hood.
DIY Car Detailing: Repairing Small Paint Chips
Remember that gravel truck that suddenly changed lanes in front of you at 110 mph, ricocheting a few marble-sized rocks onto your hood? The paint has a few small chips and in a few years there will likely be rust spots the size of a quarter, and if you can fix the problem right away for under $10, it will save you a lot of money later, not to mention the embarrassment of driving a junk car that was already broken down before the accident.
DIY Car Detailing: Remove the paint
A car hurtling down the road at 60 miles per hour becomes a dartboard that catches airborne dirt. The car’s clear coat repels some of this but can trap sharper particles. Washing can remove surface dirt, but only clay scrubbing can remove stuck-on dirt. Purchase a cleaning clay kit (one brand is Meguiar’s Smooth Surface Clay Kit), which contains a lubricating spray and several sheets of synthetic cleaning clay.
Also Read: Comparing 19 Top Electric SUVs in the Indian Market
Prepare the cleaning clay by splitting it into four pieces. Flatten a portion into a little pancake in your palm and move it back and forth on the polish. Fold and knead the clay and flatten it again until the clay turns gray. Then discard it, remove the “arrows” and use new portions until you get a glass-like surface. Use these dent tips to learn more do-it-yourself car tricks.
DIY Car Detailing: Add Graphite to Door Locks
We don’t think much about door locks until the key breaks in the cylinder. A squirt of dry graphite powder will keep these delicate mechanisms moving freely. You may need to push back the dust cover slightly with a small metal nail file to access the lock. A short pump from the tube will release a sufficient amount of graphite.
Use the key to move the lock cylinder several times to force the graphite into the mechanism. Do this with the trunk lock as well.
The best way to wash your car: Wash with proper soapy water
Hand dishwashing detergent is a great degreaser, but it’s not good for car paint. Yes, it will remove dirt, grease, and old wax. But it also sucks important oils right out of the paint. Repeated use will shorten the life of your paint. Once you’ve mixed up your soapy water, take it a step further and fill a second bucket with clean dishwater.
Use your wash mitt to rinse frequently. This will remove most road grime from the gloves and make them less likely to get scratched.
Also, could you check our brand-new car collection in Ahmedabad?
DIY Car Detailing: Buy the Dual Action Polisher.
No detailer would be caught without a dual-action polisher. Don’t confuse this amazing tool with a high-speed polisher. Polishers work at such high speeds that if you stay in the same place for too long or press too hard while detailing your car, you can burn your car’s paint. Polishers are different. They work at a slower speed and vibrate as they spin.
Any DIY enthusiast can learn how to polish in just a few minutes. Polishing before waxing makes a big difference, so it’s well worth the investment. Another polishing tip from a professional detailer: Apply polish to a machine pad. Then wipe the pad on the paint. This prevents polish from flying off the pad the moment you pull the trigger. Learn how to repair peeling paint yourself.
DIY Car Detailing: Lubricate your door seals.
Spray all seals with silicone. Silicone prevents ice from sticking to the rubber and metal doors. This makes the door easier to open and also prevents seals from cracking. This is one of our Car Care Insider Tips.
Add a Van Warmer
If your vehicle doesn’t have heated seats, now is the time to add them. The additional electric seat heaters fit between the existing seat cushion and the new seat cover and are secured in place with elastic bands and straps. The seat heater controls connect to the cigarette lighter or socket.
Replacing the wiper blades
It’s easy to know when it’s time to replace your wiper blades. Press the wash button and check if the wiper blades wipe clean. Once you have streaks left behind, they are gone. There are many inexpensive blades available at auto parts stores, but we recommend choosing a trusted brand (ANCO, Trico, or Bosch) for your car care projects.
Although more expensive than inexpensive blades, quality rubber wipes are better, offer better UV protection, and last longer.
Use a silicone-free matte dashboard and vinyl protectant. Silicone Dashboard Protector Spray leaves a slick film on your dashboard that attracts more dust and requires more frequent cleaning. Plus, a shiny dashboard reflects off your windshield. This reflection and glare can affect your vision, especially at night. That’s why professional detailers use a silicone-free matte protection product when detailing your car – it looks great and reduces glare.
Spray it with WD-40 a few times a year to prevent rust from forming. Wipe off excess oil so it doesn’t drip onto your car’s paint, and you won’t have to do any other car care tasks. Use a synthetic wax Old-style paste wax looks great on classic cars. However, it doesn’t give you the same “wet look” as modern synthetic waxes, and it doesn’t last as long when it comes to car care.
When car dealers sell you paint sealant, they’re just applying a high-quality synthetic wax, which you can do yourself for a fraction of the price. Use a wax applicator sponge to apply the synthetic wax to small areas.
Conclusion: Your DIY Car Detailing

DIY car detailing is a rewarding process that transforms your vehicle into a masterpiece on wheels. By following these expert tips, you can achieve a professional-looking finish that reflects the care and attention you put into maintaining your ride. Revel in the gleaming results and enjoy driving in a car that looks as good as new.
Read Also: